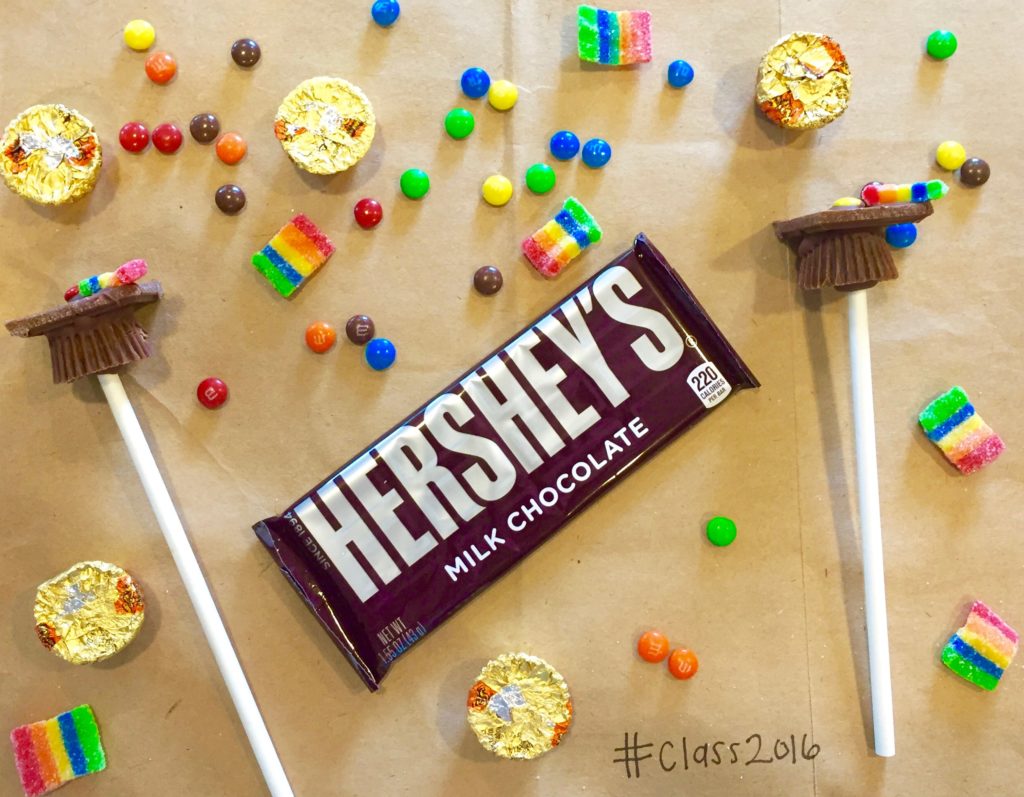
Before I head to Denver, Colorado me family threw me a graduation/going-away party with some of our friends and family from my hometown. When it was time to plan the party, I sat myself down in front of my laptop and started pinning graduation party ideas like it is going out of style. I came across these adorable mini candy graduation caps and I knew I had to have them at my party. Luckily, the heat we were having in Northern California went away for the weekend and I didn’t have to worry about my masterpieces melting in the middle of the party. Below is the recipe and step by step guide on how to recreate these graduation party must-haves:
What You’ll Need:
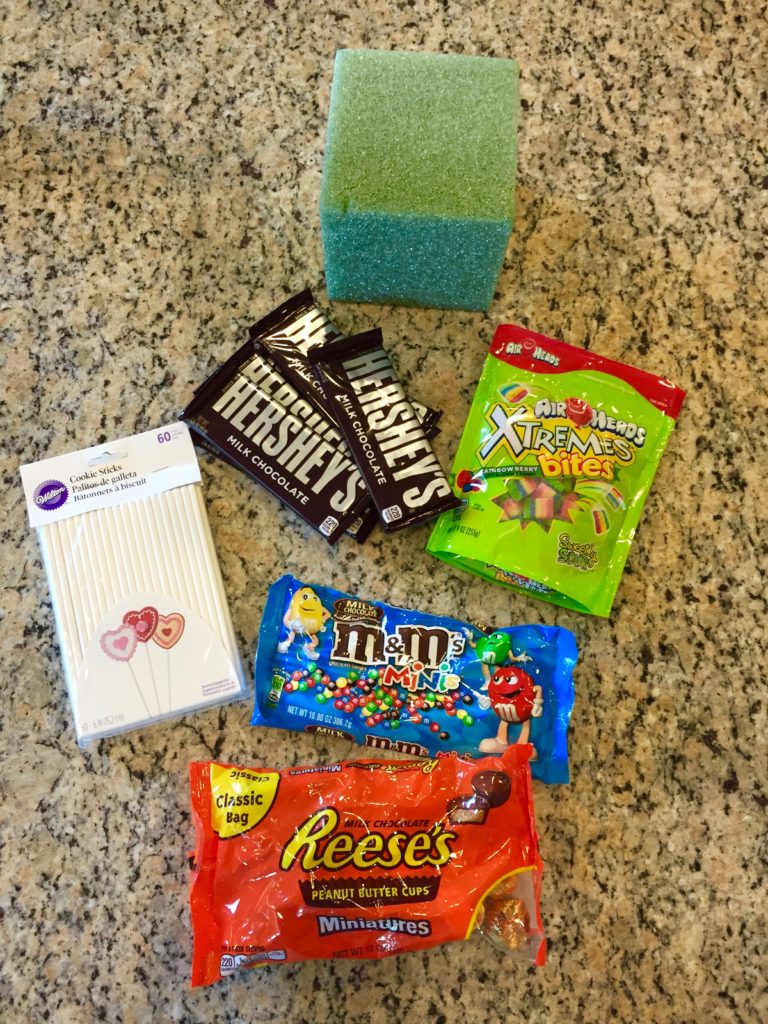
-Pack of Hershey’s Milk Chocolate (I got a six pack at Target)
– Bag of mini Reeses Peanut Butter Cups
-Bag of mini M&Ms
-Sour Air Head Belts (Target only had the minis, so my tassels turned out pretty short)
-Cake pop sticks
-Styrofoam block
-Scissors
Instructions:
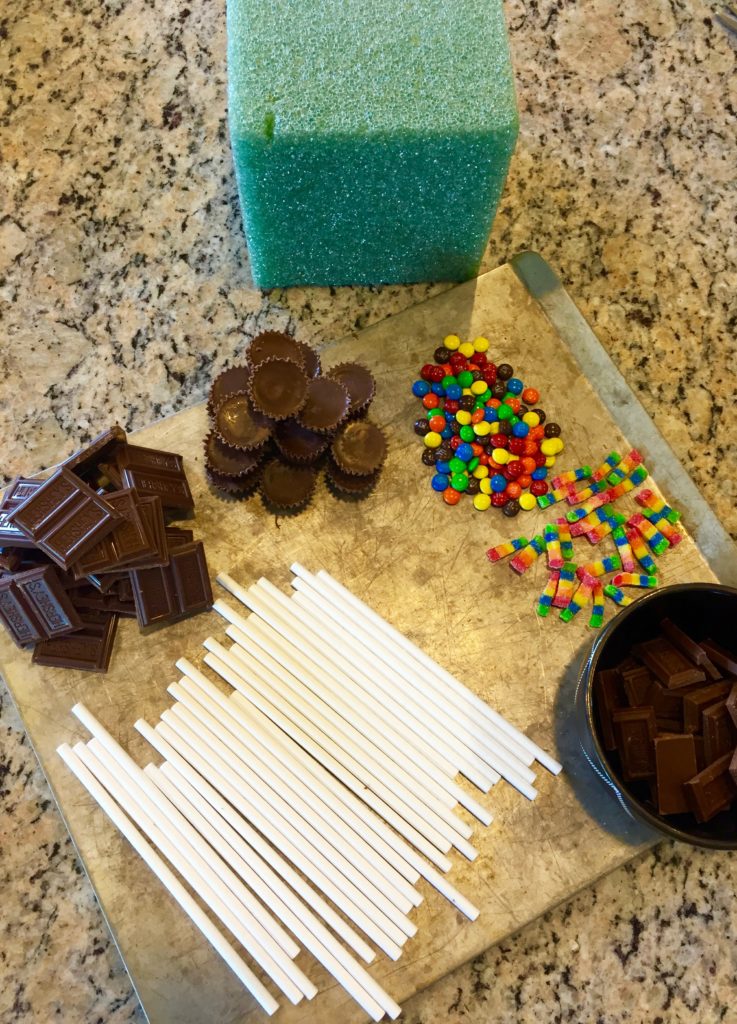
- Break the Hershey Bars into squares. This will be the top of the grad cap. Use the remainder of the bar for the chocolate you will melt and use as glue.
- The recipe I followed recommended putting the Reeses in the freezer for 10 minutes before you start. I recommend putting the Hershey squares you just made for the top of the cap in the freezer as well to prevent them from melting while you are assembling the caps too.
- Cut your the Air Head belts with scissors into thin strands that will represent the tassel on the grad cap.
- While you are waiting for the chocolate to harden in the freezer, you can melt the chocolate you are using for glue in the microwave. Place the chocolate pieces in a microwaveable safe bowl and put it on high for about 1 minute. Stir accordingly.
- I recommend making an assembly line to ensure everything is in front of you when you need it. Take the Reeses and the Hershey squares out of the freezer and unwrap the peanut butter cups.
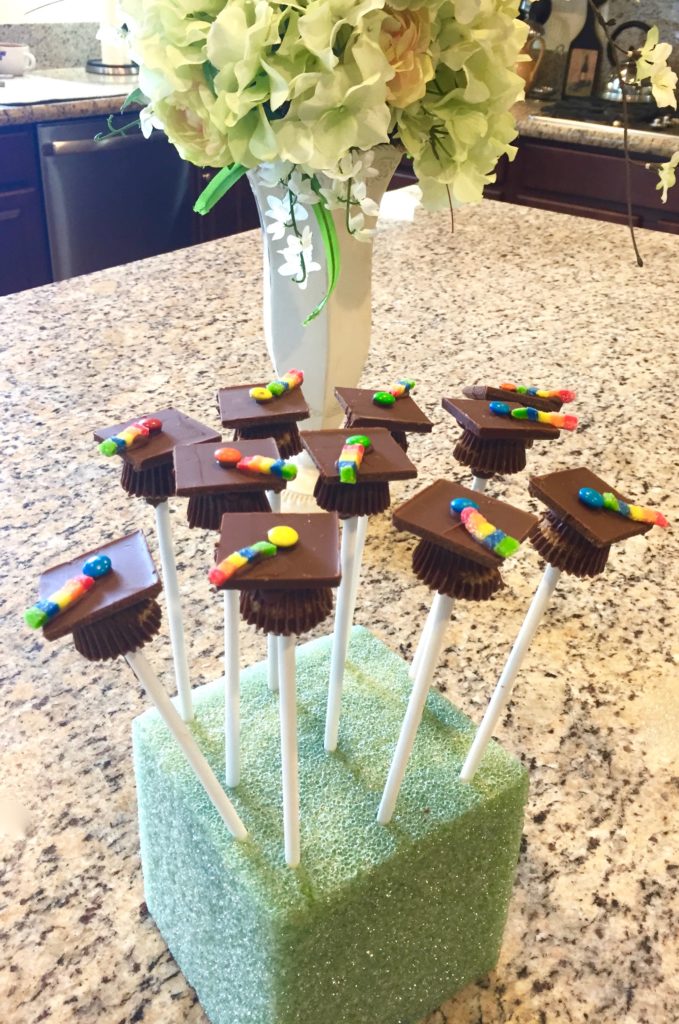
- When you’re ready, dip the cake pop stick in the melted chocolate and stick it into the peanut butter cup. Place the stick into the styrofoam and begin assembling the rest of the cap. Use the melted chocolate to glue the Hershey square (logo facing down) onto the top of peanut butter cup.
- Add a mini M&M with the melted chocolate as glue to the top-center of the Hershey square. Lastly, add your Air Head Belt tassel to the hat.
- Repeat until you have made your desired amount.
- Place styrofoam block with grad hat candies placed in it into the refrigerator until ready to serve.
Let me know in the comments below if you tried this recipe out!

That’s for the tutorial! My daughters graduation party is in 2 weeks. these will be great.
I have made these before! They are a HUGE hit! I like the multicolor candy you used as a tassel!
These are so cute! They actually look quite simple to make and cheap to purchase all of the ingredients – great tutorial.
The chocolate graduation caps are so cool.
Those are so cute! I made something similar for my graduation
Olivia these are adorable! I will be making these for my kids to take as part of a basket for a grad! Thanks so much for sharing.
Carlen | http://www.realmomswingingit.com
THESE ARE SO CUTE! Totally making them if my parents let me have a grad party (fingers crossed)!
Rachel / http://www.seashellsandsparkles.com
This is such a cute idea!!
xo
Allie
https://alliesfashionalley.com/2016/05/my-favorite-summer-skincare-products/
Oh my gosh these are so cute! I cannot wait to read all about your adventures in Denver and how you like it there!! 🙂
http://www.mollyonthemoveblog.com
These are so cute and easy! Thanks for the tutorial!